
Welcome to Frugal Tip Fridays! Today we have Stefani stopping by to give us a tutorial on how to make a few different kinds of our own handcrafted Christmas and Holiday Cards! Stefani is the owner of her own card company called Beach Greetings and we're so happy she's here! Check out these cards, they are even prettier than many high priced ones!
There are many ways to save around the holidays, however, a great way to save that is also creative is to make your own Christmas cards! Holiday cards are easy to buy and are often beautiful and creative themselves, but if your feeling crafty and have a few spare materials that are underutilized, you can use them to create these three fun and simple designs.
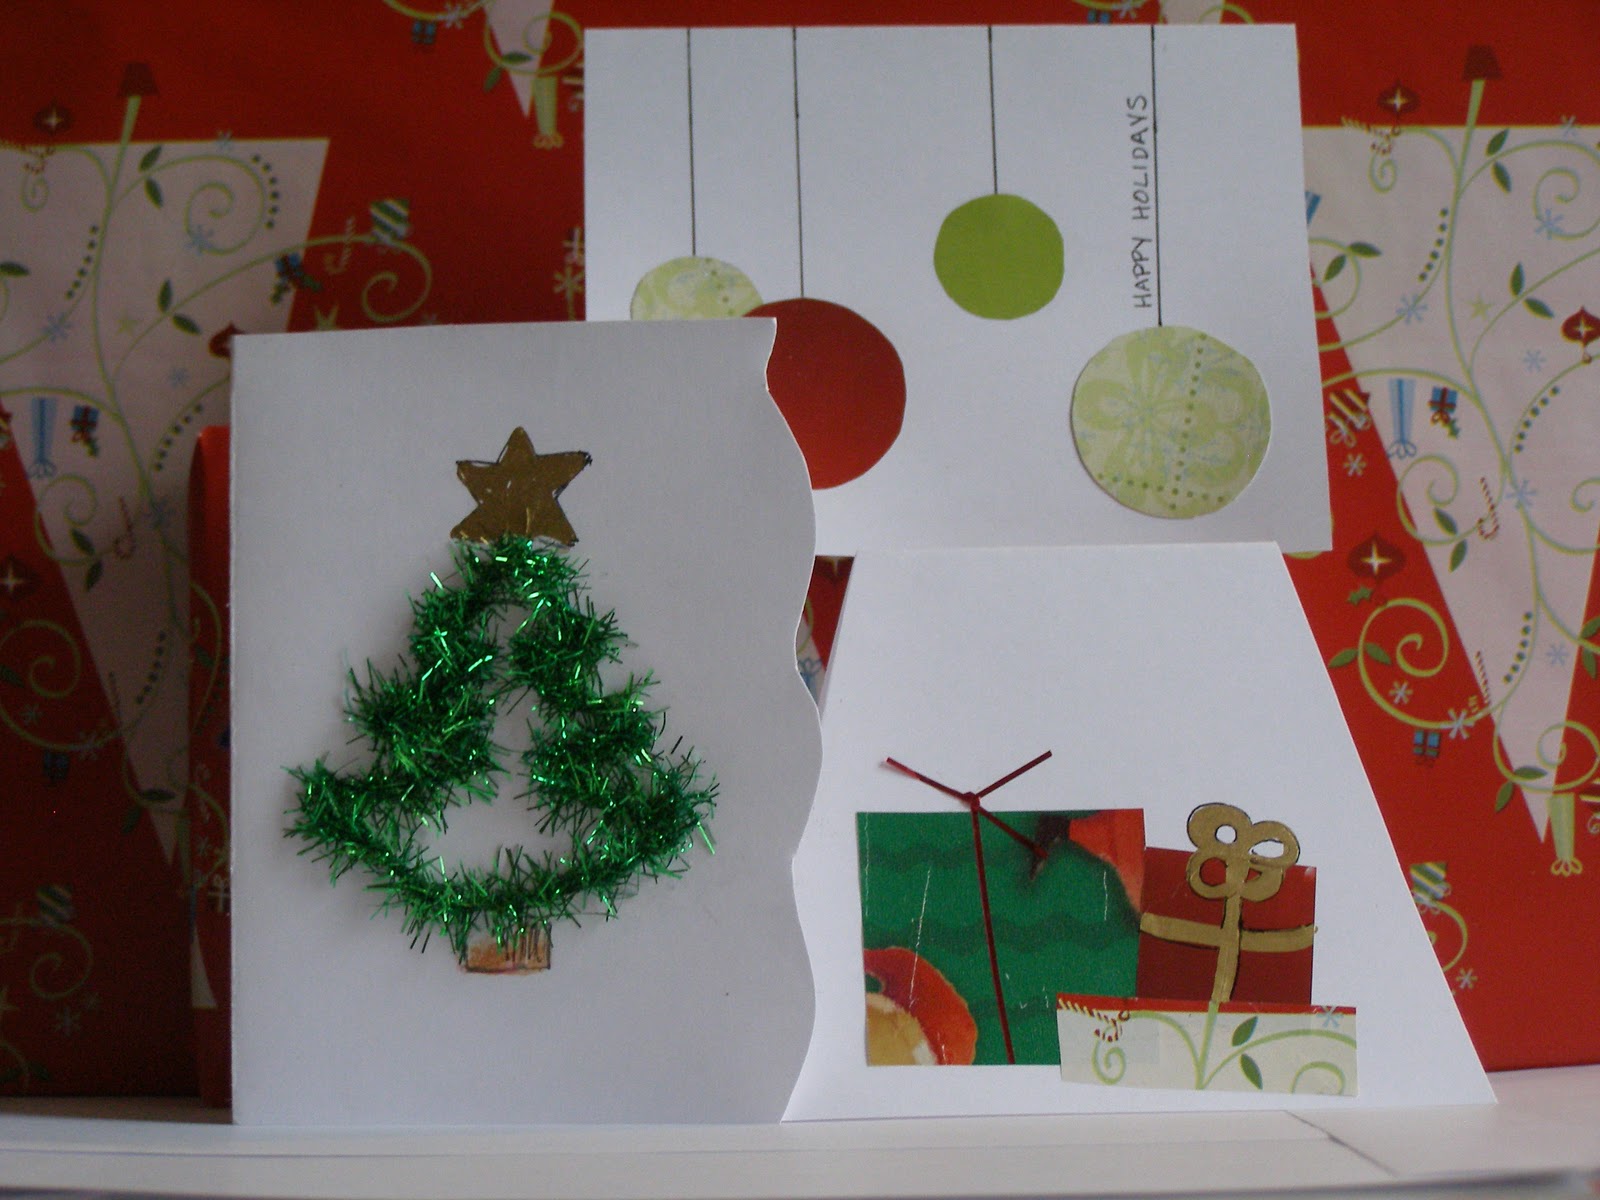
The first is the "Christmas tree" card. Featuring a simple Christmas tree and gold star, this holiday card says fun and festive in a minimalist way.
Materials Needed:
White recycled cardstock
A gold paint marker, gold colored pencil or yellow colored pencil
Glue stick
Brown colored pencil
scissors
Directions:
First, prepare your card stock. These are 'notecard' sized cards so simply fold your card stock in half and cut in the middle so that you have two 5.5 x 8 1/2 pieces.
Next, fold the half that you just cut in half again. Now you have your 'canvas' which should be positioned vertically.
Next, cut your first two pieces of yarn(3/4 inches in length), which will be the top part of the tree. The next two pieces (1/2 in.), will be the part that goes in towards the tree. The next two pieces(1 in.) will connect to those swinging out. The next two pieces(1/2 in.) swing in. The next two pieces(1 1/4 in.) swing out and the final piece(3 in.) is the longest with connects the last two pieces at the base. Use the image if you need a visual. Next, use the glue stick to apply your pieces to the card stock, starting from the top of the tree moving down. When your Christmas tree is finished, draw the base which is a simple square in brown colored pencil. You can shade it in to add a little bit of color and some dimensionality to the trunk. Then finally, draw the star at the top of the tree using your gold paint marker, yellow colored pencil or gold colored pencil. And you're done!

____________________________
The next card, "Ornament Holiday", also features a simple design. Ornaments hang from the top of the card in varying lengths. Text is added to this card, but in order to create a more dynamic design, it is written vertically along the strings the ornaments are hanging from.
Recycled white card stock
magazines, solid or simply designed wrapping paper.
glue stick
black ink pen
scissors
ruler
quarter and a nickel
Directions:
 Find some interesting red and green designs or colors in a magazine or from Christmas paper. Use your other half of the card stock, but this time, make sure it is placed horizontally.
 After you select your colored paper, use a quarter and nickel to draw your circles on the opposite side so you do not have line marks on your ornaments. Cut out approximately four circles, two green, two red, two small and two large. MIx it up if you'd like!
Using a glue stick, paste your circles as shown on the example. Finally, using your black ink pen and a ruler, draw a straight line from the top of the card to the ornament to create the effect that they are hanging. Then write "Happy Holidays" on the last string and whola! You're done!
____________________________
The final card, "Presents", features presents tied with ribbon. The shape of the card makes it resemble that of a present and makes it a little more intersting.
Materials needed:
Glue stick
scissors
wrapping paper
a small piece of ribbon
gold paint marker, not necessary, ribbon/string can be substituted
recycled white card stock.
Directions:
This card will also begin with placing your note card horizontally. Begin by selecting your wrapping paper scraps. Use different wrapping paper for each present.
Cut your first present in the shape of a large square.(2in. X 2in) Cut your second present in the shape of a rectangle(2in. x 1/2 in.) and your third present in the shape of a smaller square (1 in. x 1 in.)
Next place your presents on the card as show. Your rectangle should be the last one your place and will overlap the large present and small present which again creates dimension. Finally, cut a piece of ribbon for your large square which will be glued on the largest present. The take a small piece of ribbon and tie it. Glue this to the top of the largest present. Finally using your gold paint marker, draw ribbon on the other square present. The last step is to cut the sides of your card. First measure 1 inch in from the top of the card on both sides. Then simply cut from the bottom corner of the card up to meet your dot. And you're done!
 The frugality of these cards all depends on what materials you have and what materials you have to buy. However, for the most part, since a ream of card stock typically includes more than 100 sheets and costs about $5.00, and the rest of the supplies you can probably find around the house, these cards are definitely a frugal venture! Have fun and Happy Holidays!
 Stefani Allegretti is a freelance artist and writer and has been designing greeting cards for more than 5 years. You can see some of her designs at http://www.lbibeachgreetings.com/.
AND the WINNER of the Hallmark Giveaway using random.org is Comment #1 Amanda!
Congratulations Amanda!!! I'll be emailing you with more info!
AND the WINNER of the Hallmark Giveaway using random.org is Comment #1 Amanda!
Congratulations Amanda!!! I'll be emailing you with more info!
Each one of those is so adorable! if I had the patience? I would make them all! I made some one year, and about died after 3 of them!
ReplyDeleteooo I love making cards! The ones you showed are so cute :) I hope that when I'm on Christmas/Winter Vacation I can make some cards. It's a great way to save money and be creative :)
ReplyDeleteOh yes, Thank you SO much for the awesome giveaway! I was just commenting on that post for fun-- so I am quite humored that I won. And it's even funnier that I work at Hallmark. I'll be sharing my winnings with my mom and Granny- they enjoy shopping there.
Anyway, how do I get the give away? I'm sort of confused as to how it works. Should I send you my email address?
Hi Angela,
ReplyDeleteThank you for accepting and Congratulations! Yes, if you would email me your email address and address to send the book to that would be great and I can send you over the promo code and mail you the book.
ttys! Nikki